

SIGNATURE TAGS
My little corner of the web, to show a few of my signature tags and display the awesome artists who share their talent so we can play in PSP, as well as the Scrap Kit creators who make our play time so much more fun. And lets not forget the talented tutorial writers out there.
Tags available at  Tag extras available at
Tag extras available at
Thursday, May 30, 2013
Tuesday, May 28, 2013

Ride the Waves
New CT tag with art by Cuddly Rigor Mortis, and the new, It's Summer scrap kit by Mrs.W. at Mouse-Clicks


Monday, May 27, 2013
Basic Scrap Kit Tag Tutorial
 |
| This tag was made entirely from a Kittz Kreationz FTU Scrap Kit |
I've never written a tutorial, and I don't know that I ever will again. But I've been asked about my scrap kit tags and I thought it might be easiest to just post it here.
There are some amazing scrap kit tutorial writers out there, and I don't begin to compare to those tutorial writers. My method is just simple, so if you're looking for simple, this might help a bit.
All you need is a basic working knowledge of PSP, a tube, a scrap kit and a mask.
Open a transparent image 650x500. I like to flood fill it with white so I can see how the image looks against a background, but I always close out the white layer before I merge any other layers in case I want to keep the image transparent.
Select the tube you want to work with and a complimentary scrap kit. I normally use PTU tubes and kits, but there are some great FTU tubes and kits as well, you just need to do a bit of hunting online and be sure that you're following the T.O.U. of the artists and creators.
It's a good idea to have some sort of background to build the tag on. There are several ways to do this, but for a basic scrap tag you may either select a paper from the scrap kit , add a raster layer above the white test background, select all and paste into selection, or add a raster layer and flood fill with a complimentary color.
Apply your mask to the paper layer (or colored layer) and you have build a basic foundation for your tag. At this point you may want to add a texture to your background layer, or if it's a textured paper I often like to apply FM Tile Tools Blend Emboss to enhance the texture.
Now add the tube so you'll have the main image to build the tag around. Resize the image if necessary to a size you're comfortable working with.
I usually have the scrapkit elements open in my browser menu so I can pick the elements I want to add to the tag as I go along.
I hate to waste a good frame, so if there is a frame I especially like in the scrap kit, and if there is a close up included with your tube, its fun to play with using the frame as one of the scrap elements. This is also a chance to use another paper from the kit as a background within the frame.
To prepare the frame to be used as an element, select the interior of the frame with your magic wand tool, go to selections, modify, then expand by 3 or 4 pixels, add a new raster layer and paste the 2nd paper into selection. If the paper has a pattern or if it looks wrong to you after pasting it into the smaller area, resize the paper by 50-60%, sharpen and then paste into selection. Move the selection layer down below the frame layer.
Just remember, anything you do can always be undone and the part that is the most fun when it comes to scrap kit tags is playing with the elements.
Once you like the look of the paper (or you can even just flood fill the selection with a complimentary color) resize your close up image and copy and paste it between the frame and the frame background. Resize it to fit the frame and use an un-sharpen mask (I often use a setting of Radius: 5, Strength 20, Clipping: 5 with Luminance un-checked).
This is your chance to play with the close up image. You can mirror it in the frame, reduce the opacity, add a drop shadow, change to a black and white image (which you can do by selecting adjust, color and saturation, colorize and change both Hue and Saturation to 0). Not all artists allow you to colorize their images, so be sure and check the T.O.U. for the tube artist you're using.
When you like the way the framed image looks close off all layers except those of the frame, frame background and framed image then merge visible. That will allow you to use the framed image as an element and give you two less layers to worry about.
I normally resize the elements to a workable size before I paste them as a layer, but don't go too small. You can always resize to a smaller size once the element is in the tag, but it's more difficult to size things up. After resizing don't forget to sharpen, or apply an unsharpen mask to the element.
Now you get to be creative. Select elements that you think will compliment your image and re-size and place them anywhere you'd like them on your tag. If you place something you're not sure you like, just close off that layer and keep going. You may decide to use that layer in your final tag or not, but it's all up to you.
If you have a tube that's cut off at the waist or mid leg, and you don't want to put the image in a frame, you can use elements to cover the cut off part of the tube so it doesn't have that 'attacked by a slasher' look. Softer elements such as leaves, ribbons, flowers and mists are very good for this.
In a scrap kit tag, arranging the elements, applying filter effects and textures that you like is what makes the tag your individual creation.
Once you're happy with what you've done, delete any layers you closed out because you didn't like them, and either merge all flatten and save as a .jpg or delete the white background layer, merge visible and save as a .png for a transparent background.
Resize your image to the size you'd like your tag to be. Don't forget to use the un-sharpen mask after resizing to keep your image clear. Then add your credits. If you add the credits prior to resizing you run the risk of the credits becoming unclear during the resizing process.
*Just a note to keep in mind, after you rotate an image you may need to sharpen it again. Sometimes the rotation leaves the image fuzzy.
That's it folks.
Flowers and Wine
 Art by Screaming Demons, Sadly for us Screaming Demons has left the PSP tube world. I did manage to buy up all the tubes I could before he left though. The scrap kit is by Angelica S.-Digital Art.
Saturday, May 25, 2013

Sunday, May 19, 2013


Friday, May 17, 2013

Sunday, May 12, 2013


Tuesday, May 7, 2013

Sunday, May 5, 2013
Magic in the Air
art by Zlata_M available at PicsForDesign.com with a scrap kit by Hania's Design available at Scraps and the City


Friday, May 3, 2013

Thursday, May 2, 2013
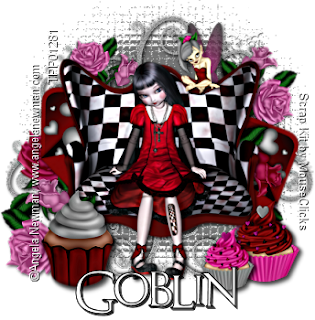
Sweet Little Things
Art is by Angela Newman, available at The PSP Project and used under License# TPP01281. Scrap kit by Mrs.W's PTU scrapkit available at MouseClicks

Subscribe to:
Posts (Atom)